Integrating ZOLL Monitors with Pulsara will allow medics to attach digital ECGs to a patient channel and share them with the entire care team.
Integration Requirements
- ZOLL X-series monitor connected to Wi-Fi (E and M series are not compatible.)
- ZOLL Online / Cloud
- https://www.zollonline.com
- ZOLL Online Admin Privileges
- 12 Lead Product enabled
- Pulsara account with EMS Admin access
- Pulsara version 10.10 or later installed on a mobile device.
Already Setup your ZOLL configuration in Pulsara MANAGER? Skip to Add ZOLL Monitors to configure each monitor.
The steps to setup your ZOLL monitors with Pulsara integration:
- Create the Pulsara Distribution List
- Collect ZOLL Integration Details
- Update the Distribution List on the ZOLL Monitor
- Confirm ECGs are sent to ZOLL Online (RescueNet 12-Lead)
- Locate Monitor Device IDs
- Add ZOLL Monitors
- Test Sending an ECG to the Pulsara mobile app
Create Pulsara Distribution List in ZOLL
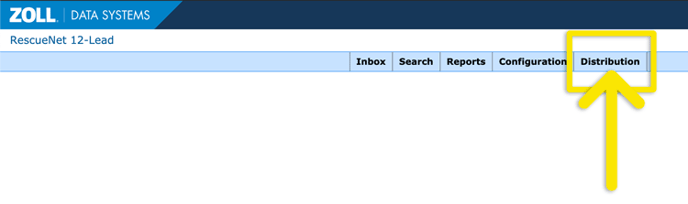
Within ZOLL’s Rescue Net, navigate to Distribution Lists by going to Distribution > Distribution Lists from the main menu.
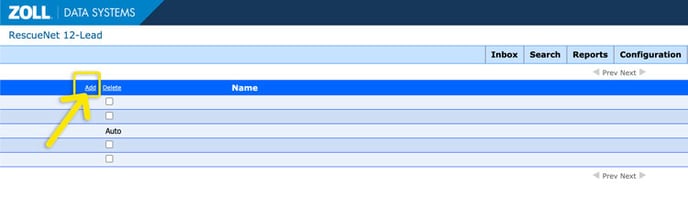
Click on Add in the list header.
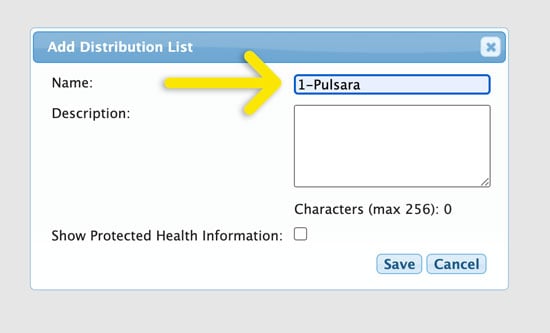
Name the new distribution list 1-Pulsara and click Save.
Open a New Browser Window or Tab and login to Pulsara Manager with your EMS Admin credentials, keeping ZOLL Rescue Net open.
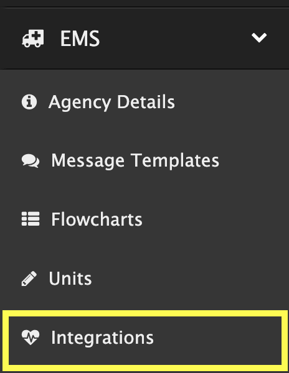
Hover over the main navigation menu and click on Integrations under EMS.
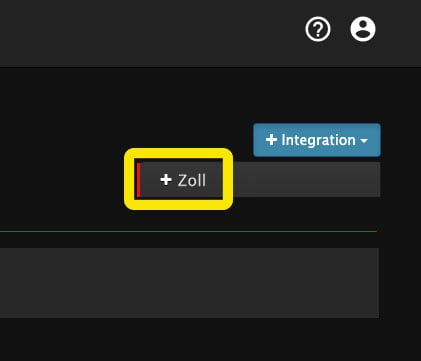
In the upper right, click on the Integration button and then click ZOLL from the drop-down menu.
Now we’ll switch back to ZOLL (in the other browser window/tab) to gather the integration credentials.
Collect your ZOLL Integration Details
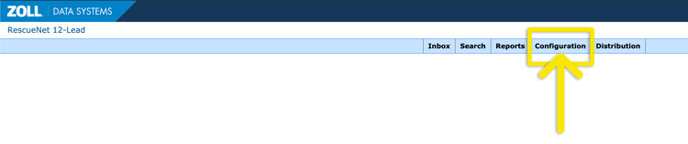
In ZOLL RescueNet, navigate to Configuration from the top menu and click on Main from the drop down menu.
Your ZOLL Data Access Key and Password can be found under the Import/Export settings section here.
Hover your mouse over the Import/Export settings and click to view them.
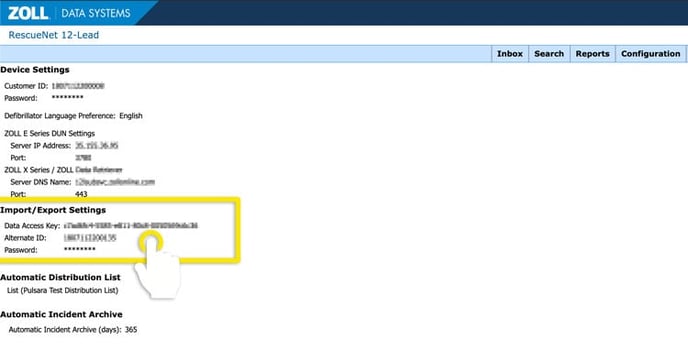
Highlight and copy the Data Access Key.
Switch over to Pulsara MANAGER, change Enabled to Yes and paste in the Data Access Key.
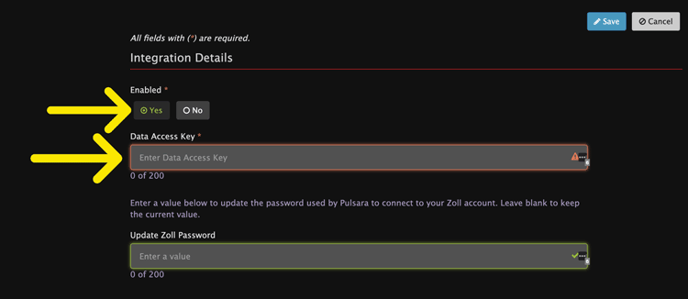
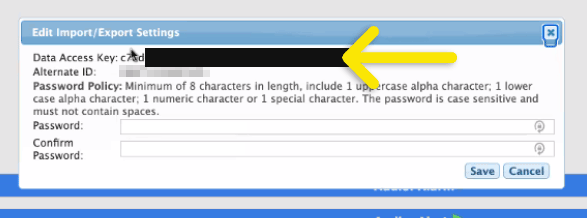
If you know your ZOLL Password (DAK Password), enter it into the second field, otherwise, return to ZOLL RescueNet to reset your password if your EMS team does not have it on file.
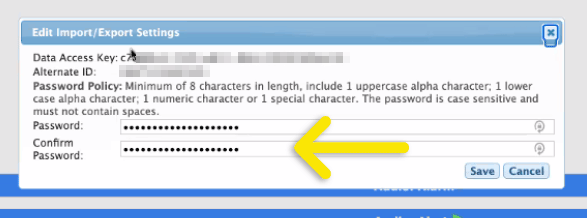
Create a new password, carefully noting the ZOLL password requirements.
NOTE: If the requirements are not met, no warning will be given.
Tap Save when done.
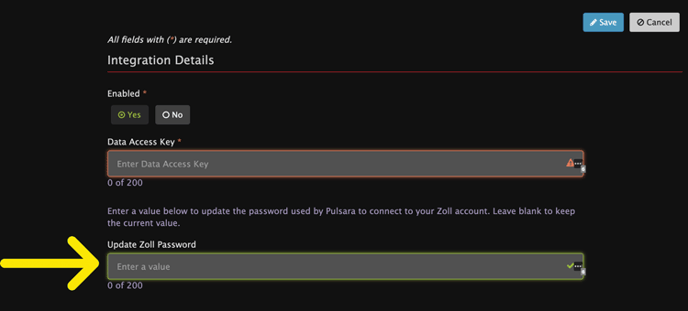
Enter the newly created password into the Integration details page on Pulsara MANAGER. Tap Save in the upper right when done.
Update the Distribution List on the ZOLL Monitor
From the ZOLL monitor home screen, use the up arrows until the Wi-Fi icon is selected in the upper portion of the ZOLL monitor screen.
When the Wi-Fi is highlighted in blue, press the selection button on the monitor.
![]()
The Wireless Settings screen will appear. Navigate down and select “Update Distribution List”.
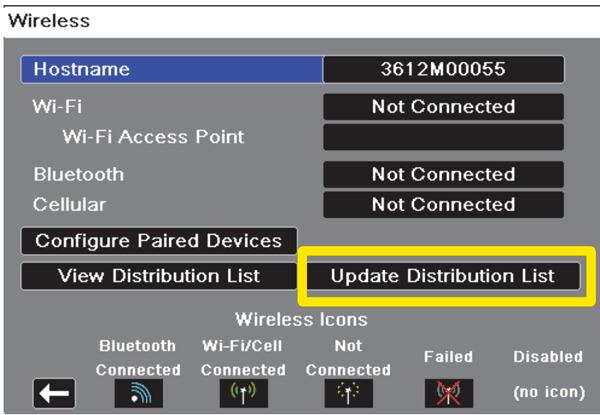
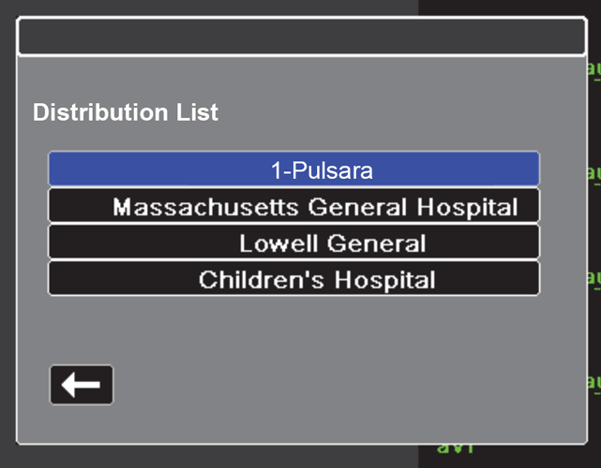
The new 1-Pulsara distribution list should appear at the top.
Press the Home button.
Confirm 12-Lead ECGs are being sent to ZOLL RescueNet
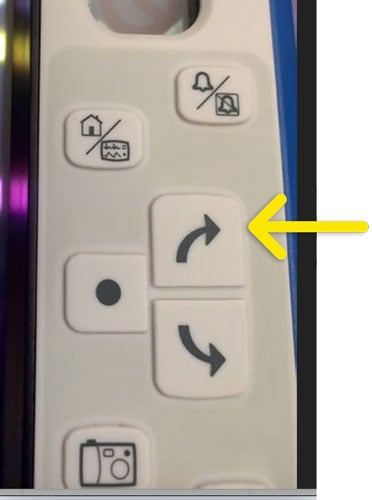
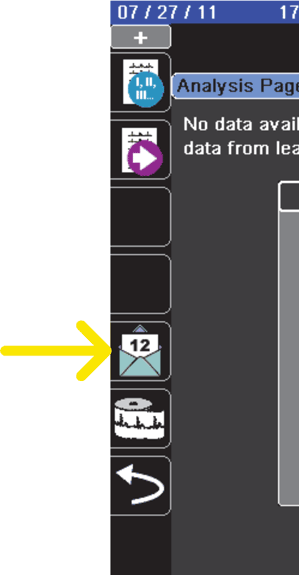
Acquire a 12 Lead ECG. After the analysis is complete, select the Envelope Icon on the left side of the monitor.
Select 1-Pulsara from the Distribution list, arrow down, and select Transmit.
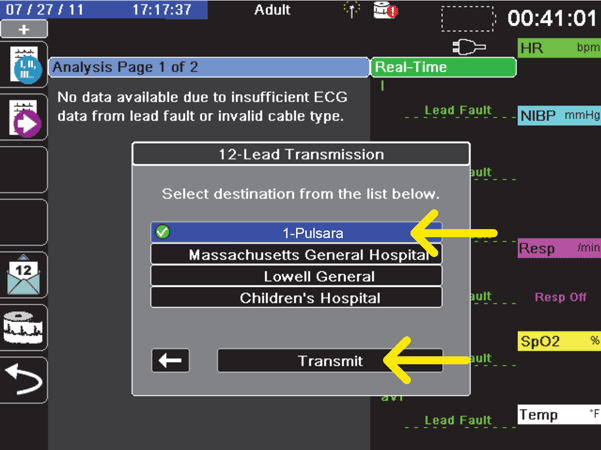
A Transmission Complete Message will display in the upper left.
In a web browser, open ZOLL RescueNet, navigate to the Inbox page using the top navigation link.
The ECG just transmitted should appear as a new row in red. This confirms that the monitor is successfully sending ECGs to the ZOLL cloud.
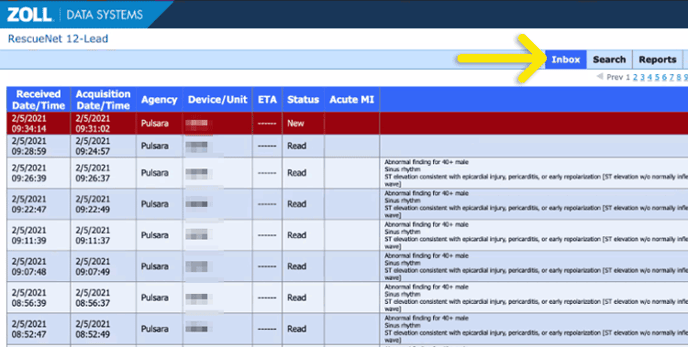
Locate Monitor Device IDs
Device IDs can be found in ZOLL RescueNet on the Inbox Page under the Device/Unit column. The monitor’s unique Device ID will be entered in the next step in Pulsara MANAGER.
Note: The Device ID of the monitors in Pulsara needs to be identical to what is shown on the Zoll RescueNet 12-Lead Inbox Page. If a Device ID is not assigned to a monitor and showing up in Zoll RescueNet 12-Lead Inbox, please contact Zoll for more information on how to add a Device ID.

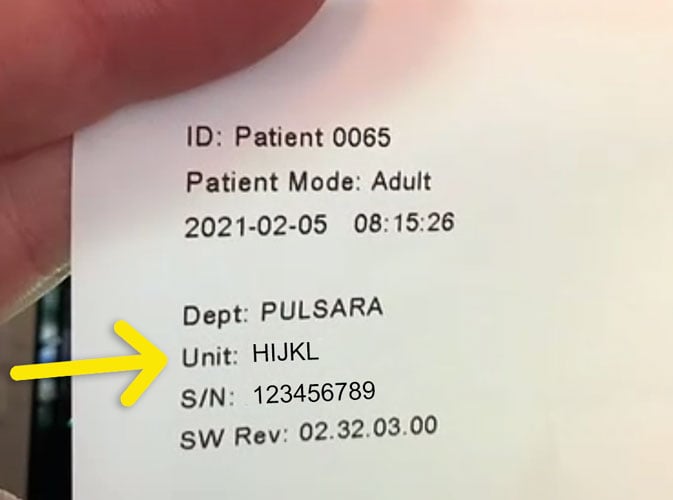
Device IDs can also be found on the monitor print out and are also called the Unit ID.
Adding ZOLL Monitors
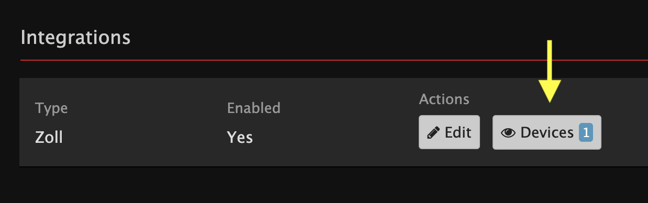
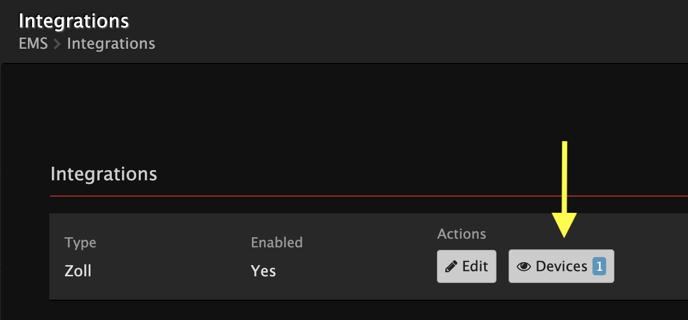
On the Monitors page in Pulsara MANAGER, click on Devices under the ZOLL section.
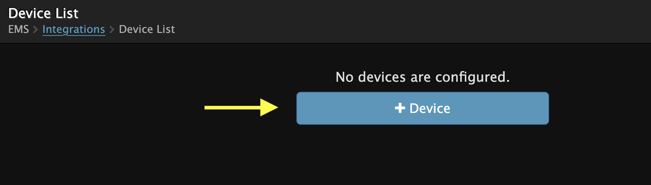
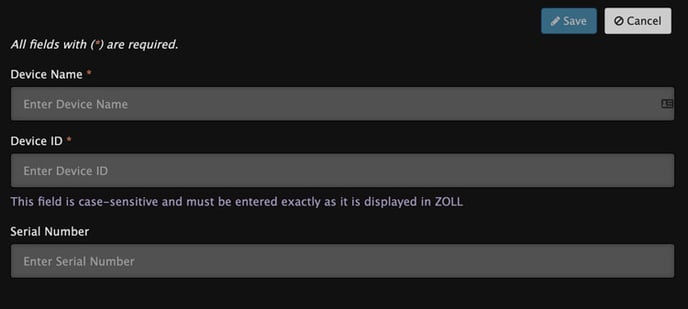
Click on the Add Device Button.
Fill in the ZOLL monitor details, including the Device Name (which can be any name you assign, and it will appear on the EMS Shift Screen in the mobile app).
Enter the Device ID (which must match exactly how it is displayed in ZOLL Online.). Optionally add the serial number of the device for matching purposes.
Tap Save in the upper right corner when finished.
After saving your new device, you will be taken to the Devices List and the new device’s details are displayed.
To add additional monitors, tap the Add Device button in the upper right.
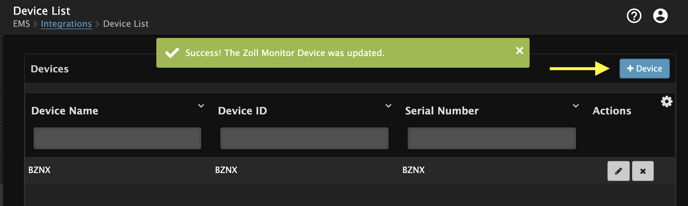
The Monitors page will display the number of devices configured with the number on the Devices button.
For easy use of these new monitors in the Pulsara mobile app, EMS crews can select the monitor for their shift on the EMS Shift Screen. Monitors can also be selected on-the-fly when adding ECGs to a patient.
Test Sending an ECG to the Pulsara Mobile App
- Acquire a 12 lead ECG with your ZOLL monitor.
- Transmit the ECG to the 1-Pulsara distribution list.
Open the Pulsara Mobile App and Attach an ECG to a new Patient Channel.